


Second Grade Art Lesson 23
Weaving Yarn, Part 2 Completing our Work
Objective:
The student will complete a yarn weaving made on their own loom. The student will be engaged in creating patterns and developing perseverance.
Materials:
the loom from last lesson, a variety of yarn colors, two sticks for hanging weaving (per student), beads and feathers are optional
Procedure:
Today we will begin weaving our yarn to create a wall hanging. The yarn we will be weaving is called the weft, these are the filler yarns used to complete the work. We will begin by getting a piece of yarn about as long as your arm is. Hook the end of the yarn in one of the loom slots. Begin weaving by going under then over, under, over, under, over etc.. working your way across the warp. When you get to the edge, turn and go back across the warp making sure that you weave opposite the row above. That is, if you went under a warp yarn on the previous row, you will go over that same yarn on the current row, then under again on the next row. Weave the entire piece of yarn until you run out. Be careful not to pull the yarn to tight on the ends. Push the rows of yarn together to close off any open spaces. To change to another color, simply start a row with the new color, weaving the same pattern as before. We will tie off the loose ends of the yarns on the back when we are finished. Each student should use at least two different colors of yarn and create a pattern with the colors they chose. Beads may be added in to the weaving. If the student is struggling with the weaving process it may be best to leave them out altogether. But student who have a good handle on the over/under process and making their patterns with ease may want to incorporate beads as they go along. Simply string the beads onto the yarn as you weave. The weaving is a long process and may take several classes to complete. Once the student has six to nine inches of weaving completed, they will need to gather their two sticks. Begin at the top of the weaving and pull off one loop at a time. As each loop is pulled, thread it onto the stick. Be careful not to pull several loops at a time as this may cause problems with the weaving. Once the first stick is complete with all of the loops from the top half of the weaving, begin on the bottom. The process is essentially the same except that typically the loops are much larger and need to be cut and tied off . The fringe that results can be used as decoration or snipped off. Finally, when the entire bottom is attached to the second stick, tie a piece of yarn to each end of the top stick to use as a hanger.
Conclusion:
Display the students work for the entire school to enjoy. Have them observe the completed projects and point out pieces that show good craftsmanship. Encourage the children to look for woven object in and around their home and school. Let them know that many things are woven using different materials such as reeds and paper. Suggest the children do other types of weaving on their own.
Artwork and Examples used in this lesson

Teachers Example

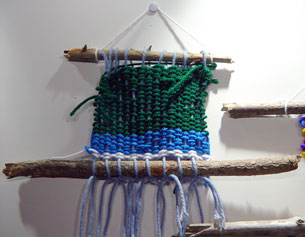
Student Weaving
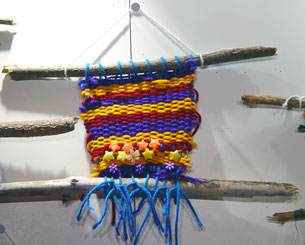
Student Weaving
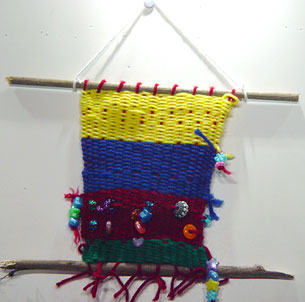
Student Weaving

Student Weaving
Student Weaving


Arttango © All Rights Reserved 2013. All logos and images used on this site are the property of the rightful owner