


Second Grade Art Lesson 22
Weaving Yarn, Part 1 Making the Loom
Objective:
The students will make a loom and thread the warp so they can begin their own weaving. The student will practice simple measurement during the process of making the loom.
Materials:
a piece of thick poster board approximately 7 x 11 , yarn, a ruler and a pencil
Procedure:
Introduce weaving as a very old arts and crafts form that is also the basis for very practical things such as fabric for clothing. Explain that we are going to weave yarn to make our own little woven art piece. We will begin by making a loom to work on. The loom is the object that holds the warp, or vertical threads. When this is done we will be able to begin weaving. To make the loom lay your ruler across one end of the board and mark off each centimeter. Next, line up the edge of the ruler with the edge of the board. Using the width of the ruler, draw a horizontal line that indicates the width of the ruler. (If your students need work on measuring have them measure down one inch or three centimeters on each side of the board and draw a line connecting the marks.) Repeat these same procedures for the opposite end of the board. When all of the marks have been drawn off, have the students take their scissors and cut on each centimeter mark down to the horizontal line. This needs to be done for both ends. When all of the slits have been cut, take the skein of yarn and put on the warp. Do this by securing the yarn end in an end slot. Pull the yarn to the opposite end of the board, put the yarn in the end slot, wrap it around the tab and through the second slot and pull the yarn back down to the other end. Repeat this process until all of the slots are filled with yarn. Have each student write their names on their loom and store them in a safe place so that we can begin weaving next lesson.
Conclusion:
Ask the students to pay attention this week to things in and around their environment that have been woven. Remind them what a loom is and also what the warp is.
Artwork and Examples used in this lesson
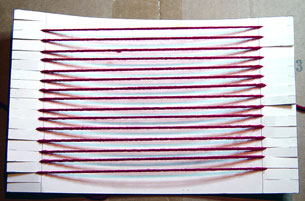
Teacher's Loom Example
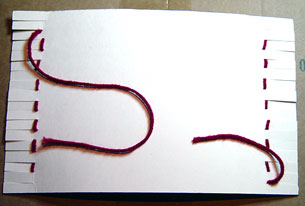
Back of Loom


Arttango © All Rights Reserved 2013. All logos and images used on this site are the property of the rightful owner