


Second Grade Art Lesson 12
Designing a Treasure Box, Part 1
Objective:
The students will create a treasure box using readily available materials. The students will incorporate basic design and aesthetics principles.
Materials:
4 x 7 cardboard box with top/ small jewelry box (can be obtained from department stores and typically they will donate them to the school), thin cardboard, white glue and scissors
Procedure:
Begin by asking the students if they have ever seen a real treasure box. Ask them to describe what a treasure box might look like and what kinds of things might be in it. Encourage them to think carefully about the attributes of a real treasure box. Tell them we are going to make a treasure box today. It will be a small treasure box but remember that great treasures can come in small boxes! We will begin by planning a design for the top of the box. To do this, we will use cut pieces of cardboard and glue lines to create the relief or raised part of the design. Discuss symmetry and explain that they may want the box top to have a symmetrical design. We will be working with small parts so planning is very important. Suggest the draw a few ideas off on paper to get ideas of interesting designs, but that they need to keep it fairly simple using shapes like triangles, squares, rectangles and lines. When they feel they have a plan, have them begin cutting their cardboard into the shapes they want to use and placing them on the box top. They may need to play around with them a bit to get the best overall design. Next they need to use white glue to glue the pieces in place. (Glue sticks will not hold well enough.) To complete the designs the students may want to add relief using glue lines or dots to give added dimension and design effects. When the designs are complete the boxes need to sit where they will not be disturbed until class next week.
Conclusion:
Ask the students to spend the week thinking about what kind of special treasures they would want to put in their treasure boxes. Encourage them to look at other boxes they may find in their homes or in stores or other places and compare the design used on those boxes with the designs on their own box.
Artwork and Examples used in this lesson
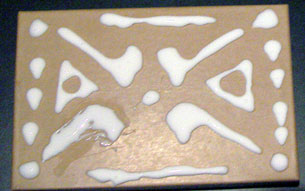
Teachers Example
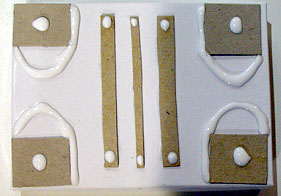
Teachers Example


Arttango © All Rights Reserved 2013. All logos and images used on this site are the property of the rightful owner