


Kindergarten Art Lesson 24
Glue Line Flowers, Part 1 Creating Art That Looks Old
Objective:
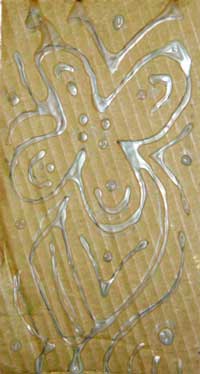
The student will recall the study of flowers from lesson 27 and do another drawing of a flower onto a piece of cardboard to exercise fine motor skills. The student will trace over the pencil drawing with a glue line. The drawing will be completed in the next lesson to make it look like an old, bronzed plate.
Materials:
Corrugated cardboard cut to any size (each student should have the same size cardboard), pencils and a bottle of glue for each student
Procedure:
Show the student an object that is made of metal, preferably bronze, that has relief design in it. (See example presented in lesson). Talk about how relief is a raised surface off of a background. We are going to create an image that looks like it is old and made of metal. Remind the students of the flower studies we did in lesson 27 and the things we learned about flowers (i.e. petals in a radial design, center, stem and leaves). Have them draw either the same flower they did before or a different one onto their piece of cardboard. Encourage them to include the stem and leafs. Also, they may have room for some background design. Once they have their drawing completed, have them trace over the lines with glue. Instruct them to go slowly to get an even glue line. If the glue beads up they will need to go back over it with another line to fill in the space. Set these on a piece of butcher paper or something you can throw away, as they dry glue may drip off of the edges. Next lesson we will complete our reliefs.
Conclusion:
Review what a relief is, a raised surface off of a background. Remind the students how we used learning from a previous lesson to create our artwork. Have each student clean up their own area.
Artwork and Examples used in this lesson
Teacher Example


