


Kindergarten Art Lesson 19
Texture Painting, Part 2 Landscape Collage Using our Textured Paintings
Objective:
The student will create a collage resembling a landscape by cutting and gluing shapes from the textured paintings.
Materials:
Heavy white paper as a ground to work on, scissors, white glue and the textured paintings from last lesson
Procedure:
Begin by explaining that we will use the painted paper from last lesson to create a collage of a landscape. A landscape is a picture about land. It might be fields or mountains but includes vast areas of land. First we will need to cut out our shapes. Choose which colors you want for the ground, (I chose red and green) and which colors you want for the sky (I chose blue and light blue). Cut the paper in long strips and make a plan as to how you want to lay them out on the background. Creativity and imagination is encouraged and you may make your landscape any way you like. You may want to watch the video to get ideas. Once you have a plan for your landscape and all of your shapes are cut out, begin gluing them down carefully with white glue. Use your pinky to smear the glue all along the paper so it will glue well. When everything is in place, you may need to turn your paper over onto the back to see if any of your strips are hanging beyond the edge. If they are, take scissors and trim off these edges.
Conclusion:
Lay your work somewhere safe to dry. You may want to stack heavy books on top of it to get it really flat after it is dry. Look at all of the landscapes in the class. Point out interesting textures and shape arrangements. Encourage the children to observe textures of different things as they go about their day. Be sure to mount their work for everyone to enjoy.
Artwork and Examples used in this lesson
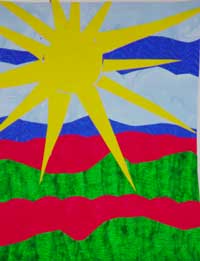
Teachers Example
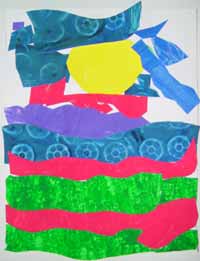
Student Artwork
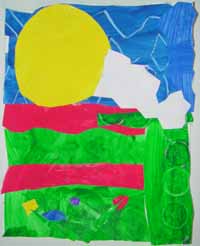
Student Artwork
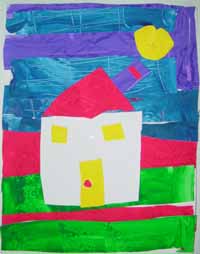
Student Artwork


Arttango © All Rights Reserved 2013. All logos and images used on this site are the property of the rightful owner