


Kindergarten Art Lesson 10
Printing a Piece of Useful Art
Objective:
The students will learn the basic concept of printmaking by creating a piece of wrapping paper.
Materials:
2” x 2” square of poster board, a thin strip of poster board, tape, scissors, paint, paint brush, plate or jar for the paint, water for clean up, paper towels and 18” x 24” white paper
Procedure:
Begin by talking about how there are many everyday objects that we use that are printed. Explain that we will print a piece of wrapping paper using a simple printmaking process. Take the 2” poster board square and cut any shape from it (i.e. triangle, square, heart, etc.) Make your shape fill the square, a smaller shape is more difficult to deal with. Next, take the narrow strip of poster board and fold it in half. Fold tabs on each of the ends. Tape these tabs down to the back of your shape. This will serve as a handle to hold while printing your shape, which we can now call a stamp. Choose one color of paint and pour it onto a paper plate or into a cup or jar. Use a paint brush to paint the bottom side of your shape stamp. Now press the stamp onto your large piece of paper. Re-coat the stamp with paint and continue on until you have completed the first row. Begin your second row using the same process and continue until you have filled the entire paper.
Conclusion:
Explain that we have just completed a basic printing process. Many things we use every day are printed. Have the children set their work aside to dry. In the next few lessons we will make a gift type of craft which could be wrapped with our printed wrapping paper.
Artwork and Examples used in this lesson
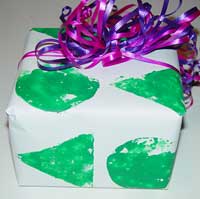
Teachers Example


