


Fourth Grade Art Lesson 18
Printmaking, Part 1 Building up the Stamp
Objective:
The student will use poster board to cut out designs and build up shapes on a background. This will serve as a plate which will be used for making prints.
Materials:
each student needs 2 poster board pieces (they may be any size, but smaller, 4” x 6”, is a manageable size), scissors, white glue
Procedure:
Today we want to build up a plate that we will use for printing cards. To do this, I want you to think of a simple, but recognizable shape such as a tree, a heart, a flower, etc. On one of your poster board pieces draw off the shape. Cut the shape out and carefully divide it into several pieces, like you were making a puzzle. Pay close attention to how you decide to cut it and make sure you keep them in order. Do not make any of the shapes to small or they become a problem to put back together. Next, cut out a collection of shapes that you can use as a boarder. These should be fairly small and relate to the main design. Use white glue to adhere your design and boarder on the other poster board piece. Once your design is in place, you may find that you need to add a few background shapes to fill large areas of empty space. Do so making these other shapes compliment your overall design. This will be your printing “plate”. Put it in a safe place to dry. Next lesson we will use these for printing and after that we will turn them into lovely little works of art. Do not rush your work.
Conclusion:
Today we have made a printmaking plate. We will use the plate for printing a set of cards in our next lesson. Before you call your plate finished, examine it to make sure there are no large areas that do not have some kind of shape in it. (Large areas will print as big blobs). If you need to add more shapes do so well before our next lesson. The glue should have a good 24 hours to dry.
Artwork and Examples used in this lesson
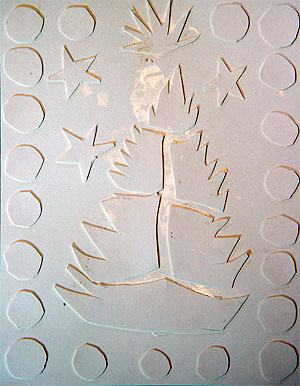
Student Artwork
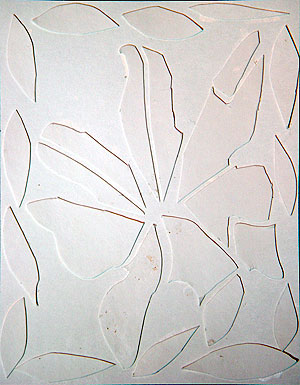
Student Artwork


Arttango © All Rights Reserved 2013. All logos and images used on this site are the property of the rightful owner