


Fourth Grade Art Lesson 17
Building Toothpick Sculptures
Objective:
The student will build a sculpture using toothpicks and glue. The student will contrast a sculpture built with lines with a previous sculpture they built using shapes. The student will focus on looking at all sides of the sculpture to create a balanced and interesting form.
Materials:
each student will need approximately 1 box of round toothpicks (flat toothpicks will not work), a scrap of poster board or matt board (frame shops usually have plenty of off-cuts and are glad to donate them to schools) to use as a base, and a bottle of white glue
Procedure:
We will begin building another sculpture today. Unlike our paper sculpture, this one will take longer and is a little more demanding. Begin on your base by pouring glue along the length of the first toothpick and lay it on your matt board base. Try to resist the desire to build a thing that you can recognize. Like our paper sculpture, you will need to just work the form as you build it up, and typically it will not look like any particular thing, but rather I want you to focus on creating an interesting arrangement of lines in this case. Put another line of glue on the next toothpick and connect it to the first. You will continue this process until you have built up as far as it can go without collapsing. This is called working with the material, which means you will have to cooperate knowing that the glue will only hold so much before it will collapse. Thus, this will be a time consuming project but they are delightful finished products. Once the glue is dry, of course, you can continue adding and building up. Also, you can create section of your sculpture by gluing toothpicks together in an aluminum foil form. Simply glue the toothpicks together on top of a piece of aluminum form, then shape the foil the way you want the toothpicks to dry. Set it aside to dry, and when you come back to work on it, you will have an entire section to add on to your sculpture. The best way to do these is to set aside time each day to add several toothpicks. You want to build your sculpture so that it is at least four inches tall. Be sure to turn your work around as you go along making sure that each side is interesting. It is easy to focus on one view of your work and fail to notice that the other sides are not developing. Like we discussed with the paper sculptures, working with form is about looking at all sides. Use your imagination and be as creative as you can.
Conclusion:
When you have a completed sculpture, you may want to take it outside and spray paint it. Your teacher will need to direct this activity and you must cooperate. Before you call it finished, turn your work around, look at from above as well as straight on from the side to be sure it looks complete from all perspectives. Handle your work carefully.
Artwork and Examples used in this lesson
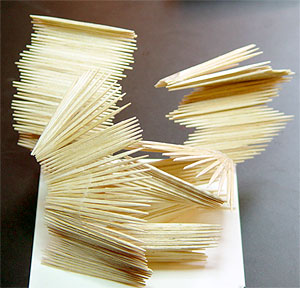
Teacher Example

Teacher Example
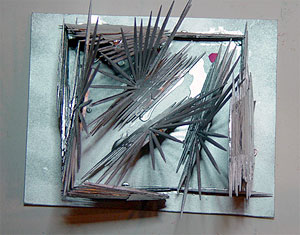
Student Artwork
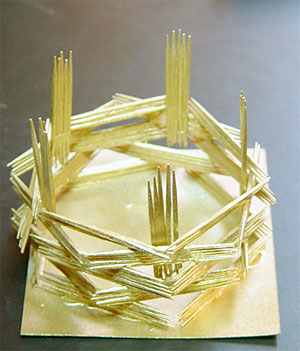
Student Artwork

Student Artwork
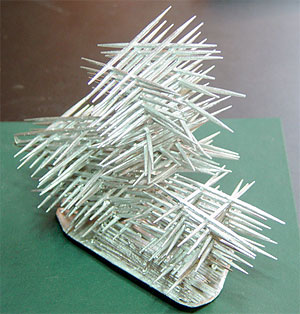
Student Artwork


Arttango © All Rights Reserved 2013. All logos and images used on this site are the property of the rightful owner