


First Grade Art Lesson 17
Working with Landscapes, Part 1 Incised Line Printing
Objective:
The student will be able to recognize a landscape painting and the three parts, foreground, middle ground and background. The student will compose a landscape on a styrofoam plate by incising lines into the surface.
Materials:
landscape examples (posted), meat trays that have had the raised sides cut off (these can be obtained from most grocery stores that typically are pleased to donate them to schools), they should be long and narrow approximately 3X6 and cut up several pieces for the students to practice on (3X3), a dull pointed or blunt tool such as a primary pencil
Procedure:
Today we are going to look at landscape paintings. Let's begin with one by Grant Wood called Fall Plowing. Typically, a landscape painting is divided into three parts; the foreground, the middle ground and the background. In Fall Plowing we see a plow and a field of dirt in the foreground. In the middle ground we see a field of haystacks, a couple of other fields and a farm house and barn in the middle ground. In the background we see more fields. Notice that the horizon line, or where the sky meets the ground, is high up on the painting. Landscape paintings usually show hundreds of miles of land and tell us about particular areas where people live. Grant Wood painted the landscapes of Iowa. Look at other landscapes to see if you can pick out the three parts and tell where the land is located. We are going to continue working with printmaking but we will be working with a different approach than what we have in our last lesson. Rather than building up a raised surface, a relief plate, we will be incising lines into the surface of our plate. Your teacher has already prepared some meat trays for you to work on by cutting the raised edges off so you will have a flat surface to work on. These trays are what grocery stores sell meat on. You can easily puncture these trays so be careful not to press to hard but you need to press hard enough to make your line show up. Before you begin you need to do two things. First, plan out a landscape of your own on scrap paper. Be sure you have a middle foreground, middle ground, background and the sky which should be high on your plate. Next, use a small piece of the meat tray to get a feel for how much pressure you can put on your tool to make a line cut in the surface. You might also try making textures with small point marks or short lines. Play around with your practice piece to see what you can come up with. When you are comfortable with working on the Styrofoam and when you have a great plan for a landscape, begin working on your final plate. In our next lesson we will print our landscapes.
Conclusion:
Today we have learned the three parts of a landscape. Can you name them? What is a horizon line? Who painted Fall Plowing? Put your name on your plates and store them in a safe place for printing in our next lesson.
Artwork and Examples used in this lesson

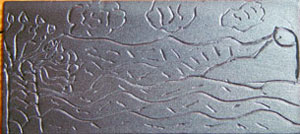
Practice Example
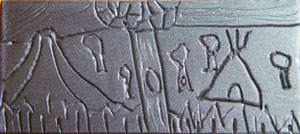
Student Artwork
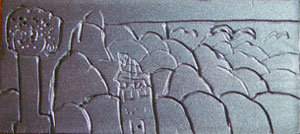
Student Artwork
Student Artwork


Arttango © All Rights Reserved 2013. All logos and images used on this site are the property of the rightful owner