


First Grade Art Lesson 15
Printmaking, Part 1 Making a Relief Plate
Objective:
The student will create a relief plate to use as a stamp for printing cards.
Materials:
White glue, scissors, thick cardboard
Procedure:
Today we are going to build up a surface to create a relief plate. We will use our relief plate as a stamp for printing cards. To make your plate, begin by cutting out approximately a 4 x 4 inch size geometric shape. A relief means the surface is built up. That is what we are going to do by cutting out smaller shapes and gluing them onto this shape. You want to make sure that the surface is filled, yet you do not want to overlap these smaller shapes. Leaving a large area blank will result in poor printing. The relief shapes you cut out may be circles, triangles, or any other shape. Glue them down with your white glue. Next cut out an inch-wide strip of your cardboard, fold it in half and bend up each of the ends. Put glue onto these tabs. Attach it to the other side of your relief plate as a handle. These need to be put in a safe place to dry. Next lesson we will use them to print cards.
Conclusion:
Ask the children what a relief plate is. Make sure they understand we will be using these to print cards.
Artwork and Examples used in this lesson

Stamp Examples
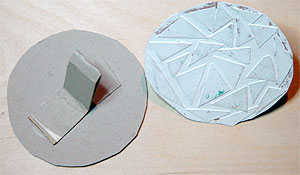
Stamp Example with Handle
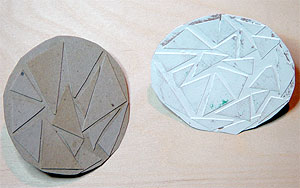
Stamp Example


Arttango © All Rights Reserved 2013. All logos and images used on this site are the property of the rightful owner